MEDIAART 2G03: Practice #1
Practice #1: assess the qualities of audio files/recordings and import them into fully portable digital audio workstation (DAW) project folders
Notes
Before attempting to complete a practice submission for this practice, in your tutorial, make sure you've thoroughly reviewed my notes about the following two topics (this material, together with the tutorial instructions, is also the basis of the sections of the in-term and final exams about this practice):
Tutorial
Goal: To create a portable DAW project (using Reaper) and render to a WAV file.
Purpose: In this area of technical practice, we're getting used to working with each other, working through instructions, the tutorial computers, and the main software (Reaper) we'll use throughout the course. We're also noticing the different kinds of files that typically make up audio projects (source files, project files, rendered results) and practicing a way of organizing that collection of files (keeping it together in a unified project folder) that will help us move our work around, back it up, share it with others, etc.
Detailed Instructions
Note: Just a reminder that any files you download/create on the Media Arts Wing computers are not saved from session to session. As such, you should be ready to backup your work (i.e. working folder) to a cloud drive or USB device
A. Acquire an interesting Creative Commons sound from freesound.org
- Create an account at freesound.org (and don't forget your new username and password).
- Search for a freesound.org sound that is (a) interesting to you, (b) in a WAV or AIFF format, (c) at a bit depth of 16 or more bits and (d) at a sampling rate of 44100 Hz or higher. Download the sound (ctrl-click where it says "Download, right click + save as"). If you're not sure whether your sound meets the criteria, ask for help during the tutorial.
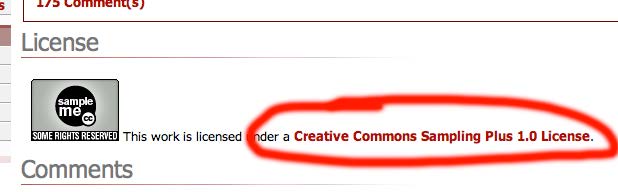
- Take a moment to understand the intellectual property considerations around your chosen sound: what is the name of the license under which this sound is available to you? Click through to get more details about what those license conditions mean. What conditions or restrictions are there on your use of this sound? If this were a project, you'd need to take reliable notes about the creator, the source (i.e. the URL) and the license conditions on this sound.
- Take a moment to think about how you would describe your chosen sound in referential and reduced terms (see the notes you should have already read about Modes of Listening).
B. Setup a new Reaper digital audio workstation (DAW) project, with attention to some important nuances
- Launch Reaper. When the program has finished launching, you will be in a blank, new project. If for some reason you don't have a blank new project, you can always create a new project by selecting File: New Project from the menus. (Note: when you launch Reaper you may receive a message about choosing a device - Click yes in that dialogue window, change the sample rate to 48khz and accept).
- Our digital audio projects will all have a sample rate - the number of times per second measurements of the audio level are made and passed on for audio playback (or storage). We'll talk more about sample rates in our full-class meetings and the online modules but for now let's choose to work at 48 kHZ (48 kilo-Hertz or 48,000 Hertz or 48,000 cycles per second - all different ways of saying the same thing). Set the sample rate in File: Project Settings to 48000 (change the setting AND tick the box): PLACEHOLDER Image
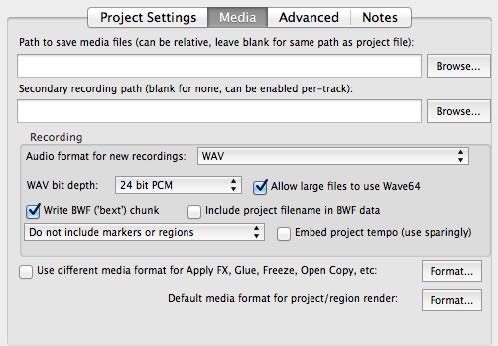
- We normally use a bit depth of 24 bits (at least) during any recording (or any mixdown or other creation of audio files within a production process). Take a moment to verify that this is the case on the "Media" tab of the File: Project Settings dialog (see image below - where it says WAV bit depth it should say "24 bit PCM":

- When we work with digital audio projects in a DAW we will have a project file and some number of source audio files. The project file actually doesn't contain any audio data - it just contains instructions for how the computer should combine the audio files. Save a project file now but don't just save the file anywhere - use the Save dialog that pops up to create a new folder somewhere you will keep your audio work throughout this course ("create subdirectory for project"). Make sure to name it with the tutorial number and your name, i.e. tutorial-1-david-ogborn. Also make sure that "Copy all media into project directory" is selected (but convert media unselected). This is a VERY important step so pay close attention to it! If people get confused and lose audio recordings between the studio and the lab or home it is usually because of not being careful at this step!:
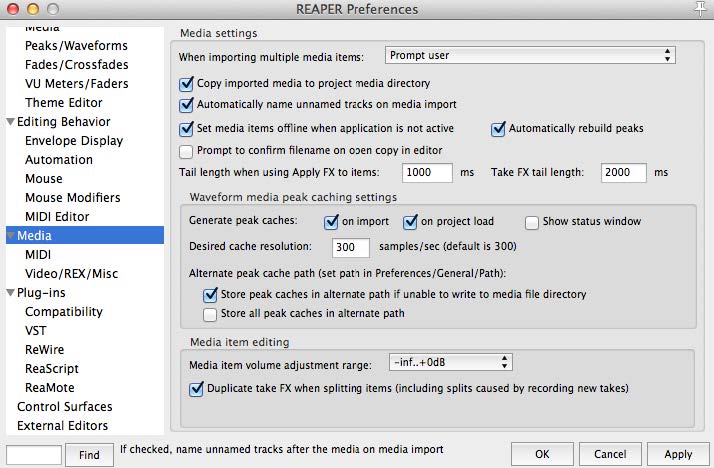
- We need to set or check a Reaper preference to make sure that any new audio files we import into this project get copied to the project folder we created. The relevant setting is under Reaper/Options: Preferences: Media: Import and is called "Copy imported media to project media directory." Make sure it is checked
- Finally, if you look at File: Project Settings: Media you will see that the first parameter in that window is called "Path to save media files". In the default setting (blank) the audio files you create during the project will be saved to same folder as the one that contains your project file. So making a new folder and saving the project file is necessary to keep your project together! If you do everything right you'll be able to move that whole folder around confident that it contains everything needed for the playback and exporting of your project.
- Now we are going to import your downloaded Freesound recording into your Reaper project. This is also a step to be treated with great care, because some things can go wrong here that may cause you problems later on. Using Insert: Media File select your downloaded sound for insertion into your project. Note you can also click and drag from the Finder/Explorer into the Reaper window to do this. Look at your project folder in Finder/Explorer to make sure it contains a copy of the file you just inserted.
C. Explore basic DAW editing operations
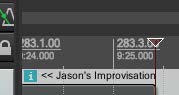
- Experiment with playing back the project and "scrubbing". The play and stop controls should be straightforward enough. Note that you can reposition playback by clicking on the top of the "scrubber" or horizontal timeline at the top of your Reaper project window.
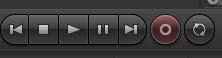
- Here are the "transport" playback controls:
- And here is the "scrubber":
- Experiment with trimming the beginning and/or end of the sound using the trim controls on the middle left/right of the inserted audio region (hover over the left or right ends of the inserted audio region and then click and drag). Before you do this turn of "Snap" (which would constrain your choices to certain moments in an imagined musical tempo).
- This is the control you click to enable or disable Snap:

Experiment with adding short or long fades to the beginning and/or end of the sound using the fade controls on the top left/right of the imported audio region (again hover over the top-left or top-right of the region and then click and drag).
- Experiment with copying and overlapping audio regions. Click on a region and use Cmd-C to copy it to the clipboard then Cmd-V to paste it OR Cmd-click-and-drag on a region, dragging it to a blank area below your track to create a new track and leave an independent copy of the audio region on the new track. You can create interesting musical and sonic effects just by making many copies of something and arranging them in time.
D. Render/export a deliverable "mixed down" audio file (a "rendered result"), with attention to sample rate and bit depth
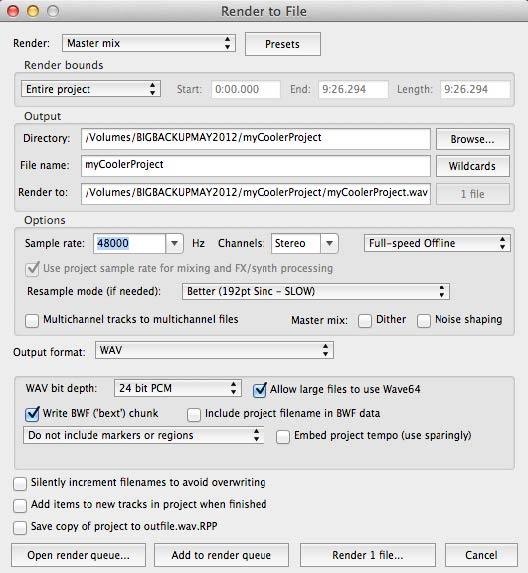
- After creating some interesting layering/sequencing, let's export a new single, high-resolution audio file that is the result or "mixdown" of our work. In Reaper this is accessed through File: Render and it leads to a dialog with lots of options that we need to pay attention to:
- Render bounds: This controls what portion of your project (in time) will be in the new audio file that is created. Entire project is a reasonable choice for now, but later on we may need to use different choices there.
- Sample rate: Unless you are giving the file to someone for a specific purpose (which we'll discuss later) the default choice would be the same sample rate as your project sample rate - to avoid an unnecessary conversion of sample rates. So: 48000 in this case.
- Channels: Should be stereo (that is to say, an audio file containing two separate signals: one for the left headphone/speaker, one for the right).
- WAV bit depth: Again, unless you are making a file for certain particular purposes, it is best to stick with the high resolution format of 24 bits per sample. So: 24 bit PCM
- Directory and filename: These are going to control where your exported mixdown file goes.
- When everything looks right - and I can't emphasize enough how much you need to take the time to verify these settings every time you render/export something - press Render to create an independent, simple sound file representation of your work. Here's an example of how it might look:
- Now let's quit Reaper and check our work independently - don't trust yourself or the software to do things right the first time (or anytime without checking your work independently)! Save your project file and quit Reaper completely. Find your exported "bounce" (the new independent audio file you just created) using the operating system's file browser (eg. Finder on Mac) and open/play it some other way. Does everything seem the same? Try clicking on the file and accessing Properties for it to see if your operating system gives you any info about the channels (eg. stereo), sample rate and bit depth.
Package the submission requirements into a ZIP archive
- If your rendered file was not in your project folder, move it in there.
- Right click on the project folder in your operating system's file navigator and find the option to compress/archive it to a ZIP folder.
- Click again on the ZIP folder you create to verify that it contains everything it should, per the specifications at the top of this page.
If you've done ALL of the above: congratulations! You've completed the first area of technical practice and can submit it in a weekly submission folder for this course. Do take a moment to verify for yourself that you genuinely have met all of the requirements before submitting, as that will save everyone some time and energy. (And don't worry if you still get something wrong after verifying - all good, you'll have the chance to resubmit it assuming you haven't left it to the very last week of classes...)
And one more reminder: any files you download/create on the Media Arts Wing computers are not saved from session to session. As such, you should be ready to backup your work (i.e. working folder) to a cloud drive or USB device. Even if you have submitted a complete working folder on Avenue, I still recommend backing up your work to a USB device or cloud drive, in case you need to revisit/resubmit/reuse the work at a later date.